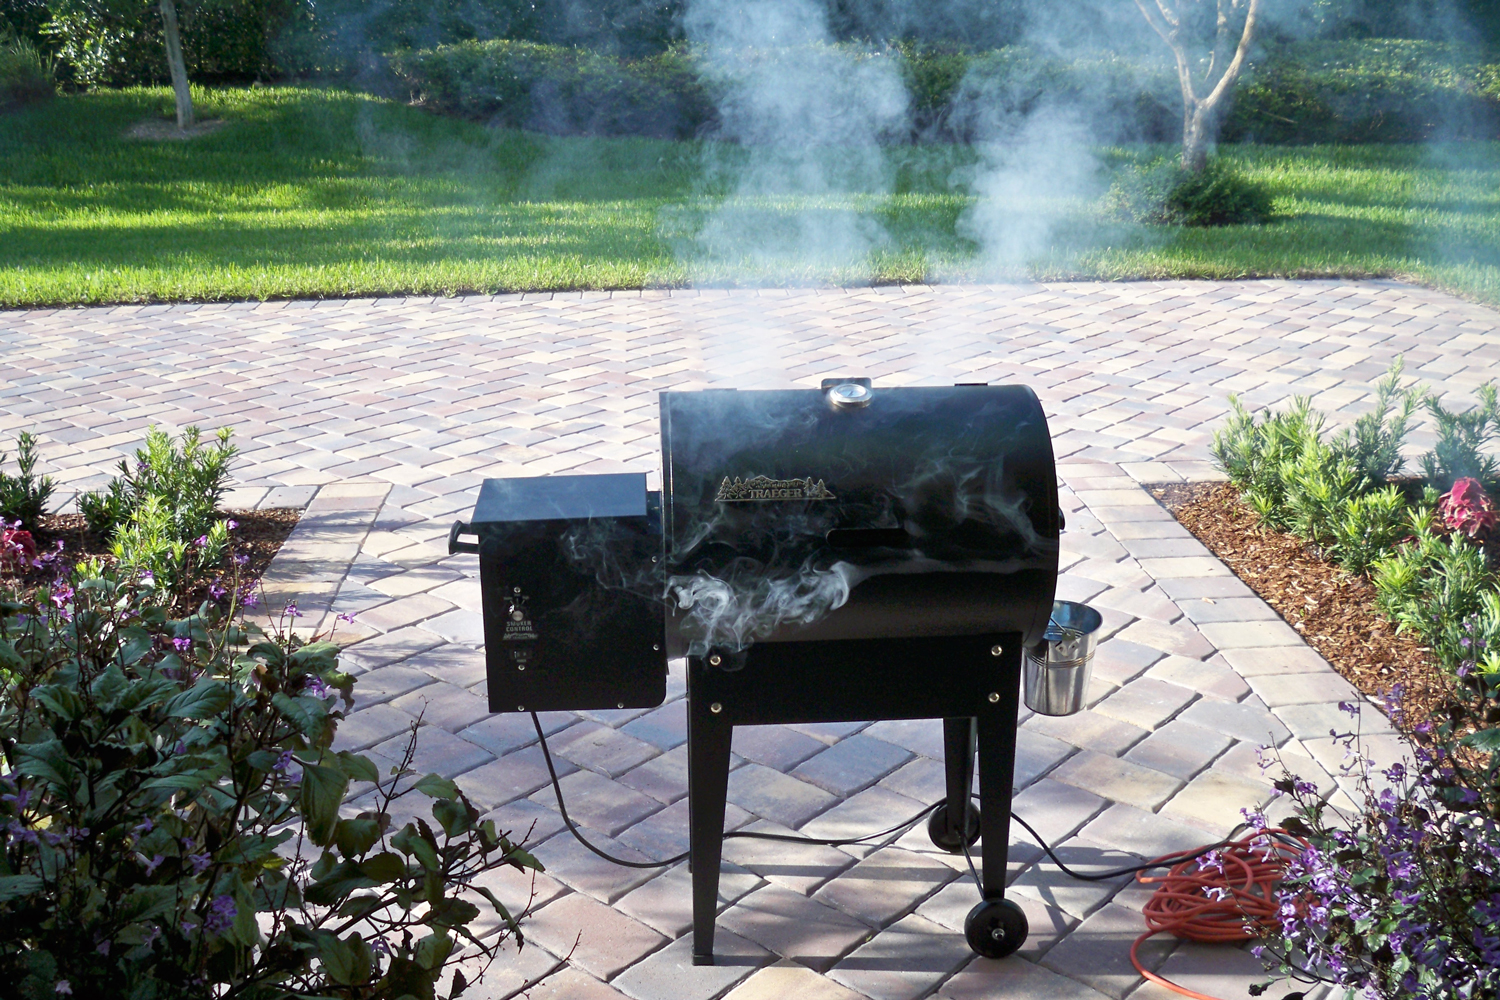
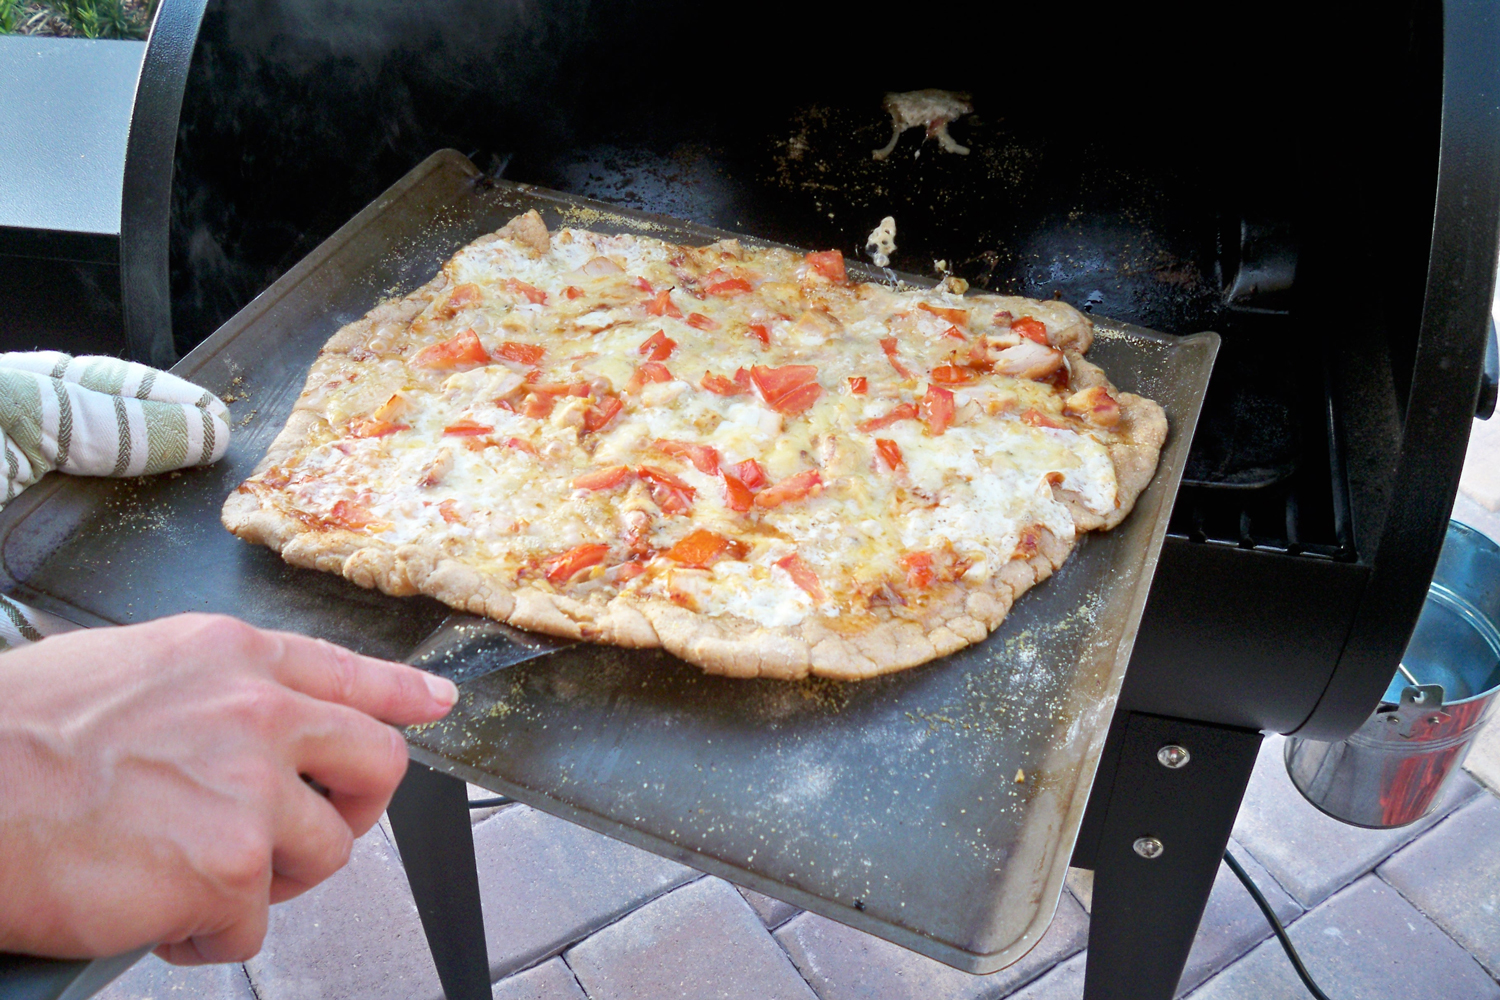
You can grill pizza on any BBQ, but I just bought a Traeger Junior Pellet Grill and it is awesome for grilled pizza. If you have always loved that little bit of char that wood burning ovens at restaurants can put on a thin pizza crust you need to try pizza on a grill. The Traeger and other pellet grills also have the advantage of producing real wood smoke; the flavor on the pizza is awesome. The Traeger is a very cool gadget; I got mine on sale at Costco. It works using an electric driven motor to turn an auger that feeds wood flue pellets into a fire box to maintain a consistent temperature. That’s right no open flames, no lighter fluid, no charcoal, and no propane, guys may not think this grill is manly enough for them but that’s fine by me. I am rocking this supper user friendly grill/smoker.
I made one very traditional Italian salami pizza and one smoked chicken BBQ pizza the other night. I will give you all the ingredients and how I did it on the Traeger grill. Don’t worry you can easily make these pizzas on your gas grill or in your oven. There are detailed instructions for oven baking a pizza on my post for making the dough. I used my own homemade pizza dough but if you would rather buy store made pizza dough most Italian markets and good grocery store bakeries have it ready to buy. I am not a fan of tomato sauce but if your family likes it feel free to spread a little on the crust of your Italian style pie.
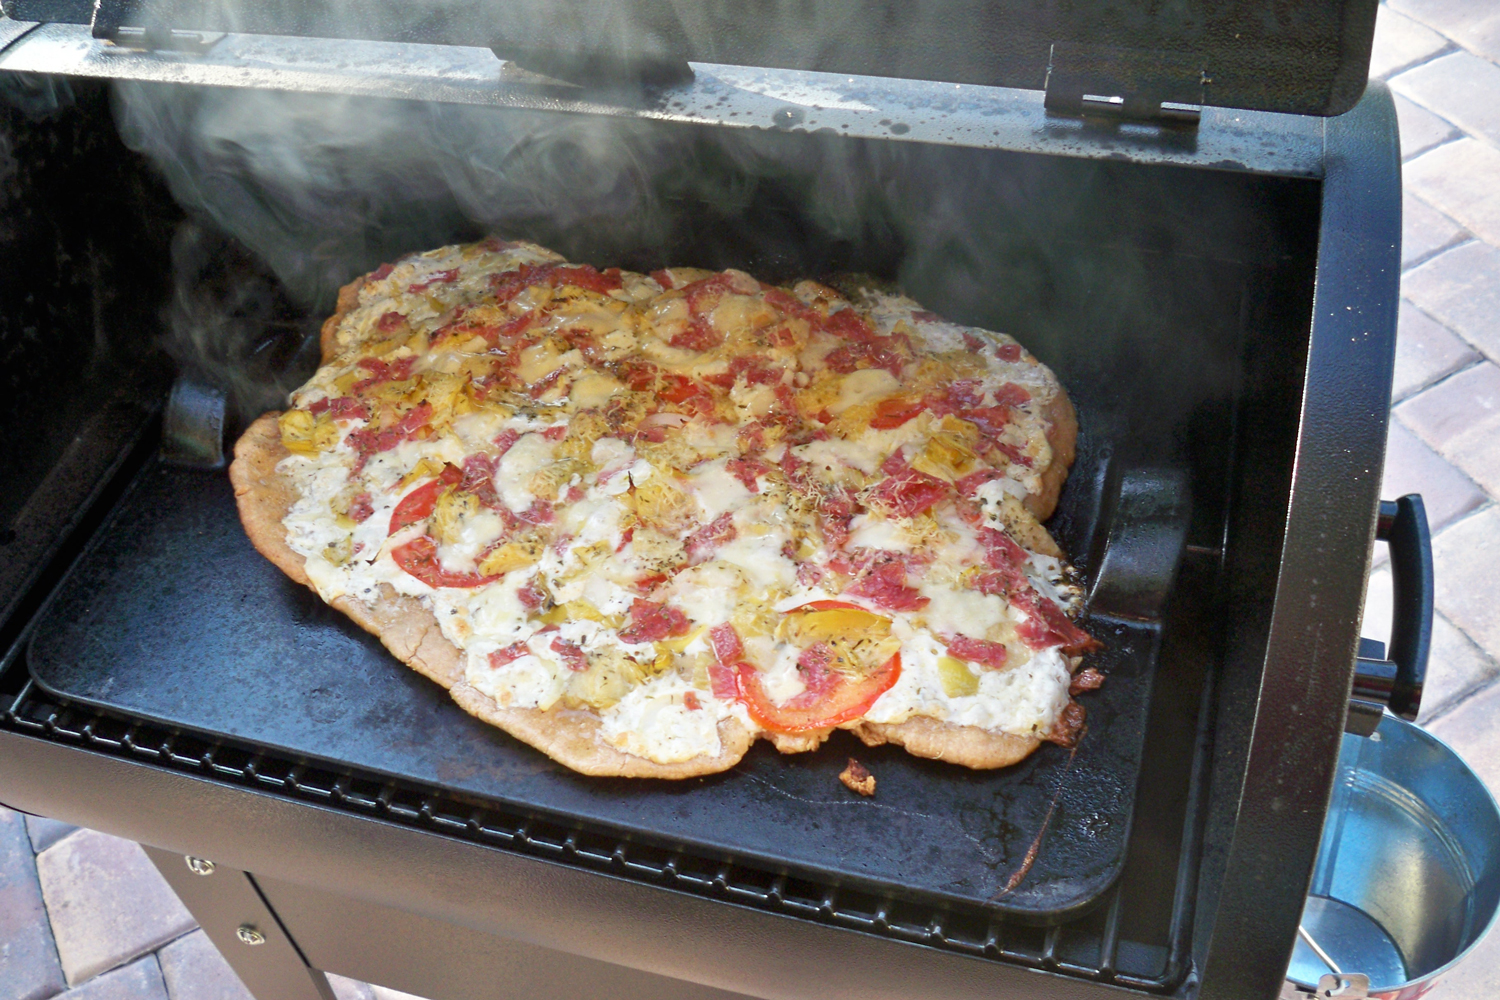
On to the pizza stone matter…I like a pizza stone and mine fits on the Traeger like it was made for it, here is the Emile Henry Rectangular Pizza Stone that I am using. I like using the stone because it can be pre-heated on the grill (or in the oven) so that when you are opening and closing the lid the temperature of the grill will not fall as fast. I also think the hot stone really helps make that crispy crust. Lastly be sure your grill is nice and clean you don’t want the dough absorbing the flavors of burned meat or sauce drippings while cooking inside your grill.
!!!UPDATE!!! Here is how to use a cloth to keep your pizza from sticking to your cookie sheet or peel, I am just using a basic tea towel that is nice and clean: Moving Your Pizza.
Grilled Pizzas–BBQ Chicken & Italian Salami
Ingredients
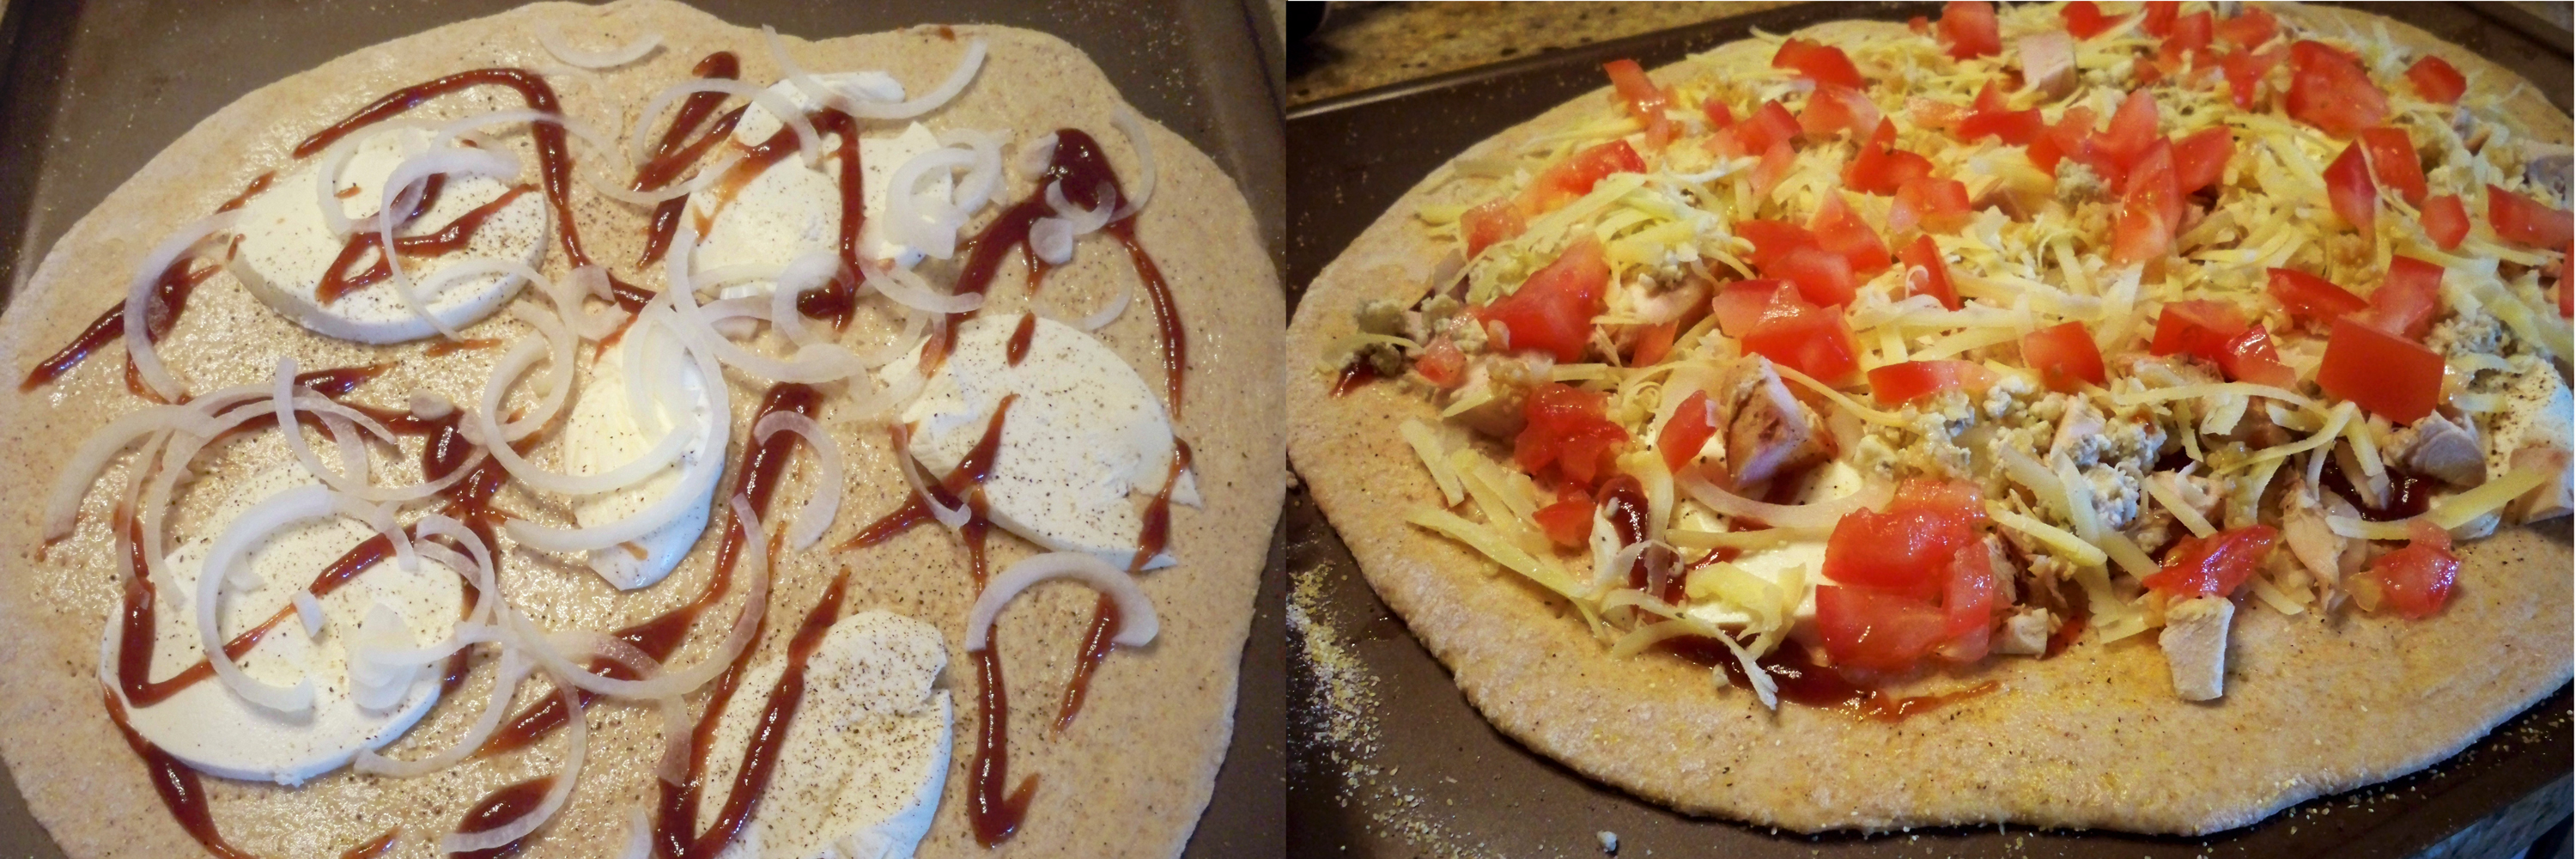
For the BBQ Chicken Pizza
- Half a batch of homemade pizza dough
- 1 smoked chicken breast skin removed I made this on the Traeger too cut into bite size pieces
- Half a 8oz ball of fresh mozzarella sliced thin
- 2-4 Tbsp of your favorite BBQ sauce
- ¼ cup thin sliced onion
- ¼ cup blue cheese crumbles
- ½ cup fresh grated strong white cheddar cheese
- 1 to mato diced
- 1-2 Tbsp of diced garlic fresh or from a jar
- Drizzle of olive oil
- Salt and Pepper
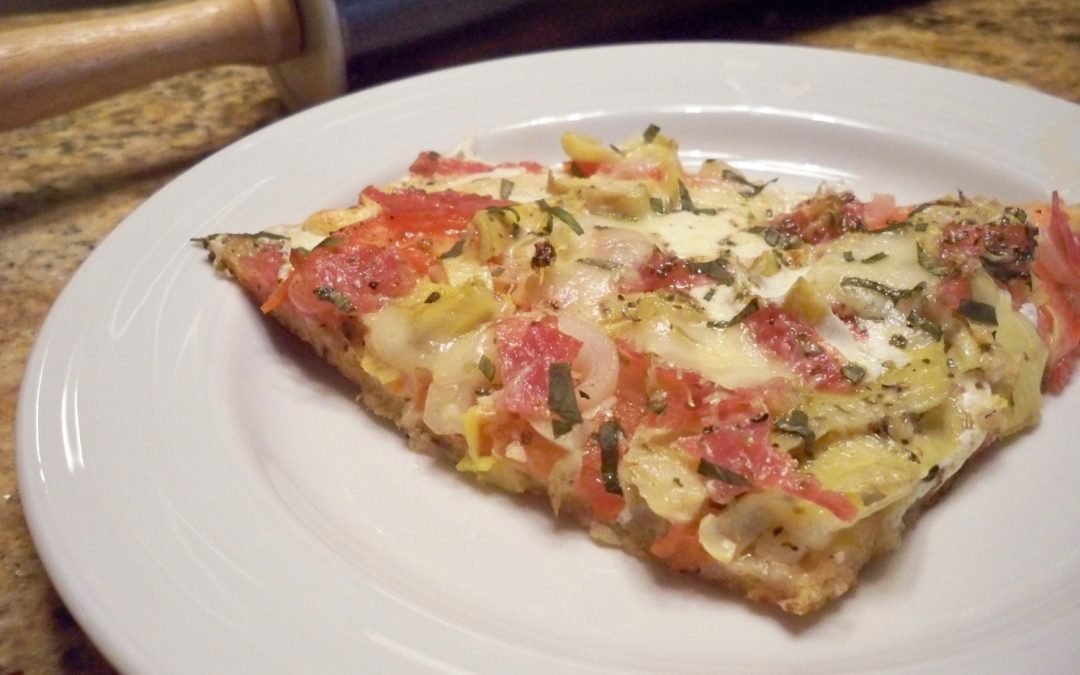
For the Italian Salami Pizza Pie
- Half a batch of homemade pizza dough
- 6-12 slices of good salami cut into thin strips
- Half a 8oz ball of fresh mozzarella sliced thin
- ¼ cup onion sliced thin
- 1 to mato sliced thin
- 6-8 jarred marinated artichoke hearts
- ¼ cup melting cheese like Gouda or Fontina
- ¼ cup or less of Parmesan cheese
- 2 Tbsp of your favorite Italian spice blend
- 1-2 Tbsp of diced garlic fresh or from a jar
- Drizzle of olive oil
- Salt and Pepper
Instructions
-
Pre heat your grill or oven to 425 degrees with your pizza stone already in there. If you are using a Traeger start the grill on the smoke setting for about 5 minutes then turn up to high or 425 degrees. Head back inside and get started on rolling out the dough. You want your pizza stone to heat for at least 30 minutes.
-
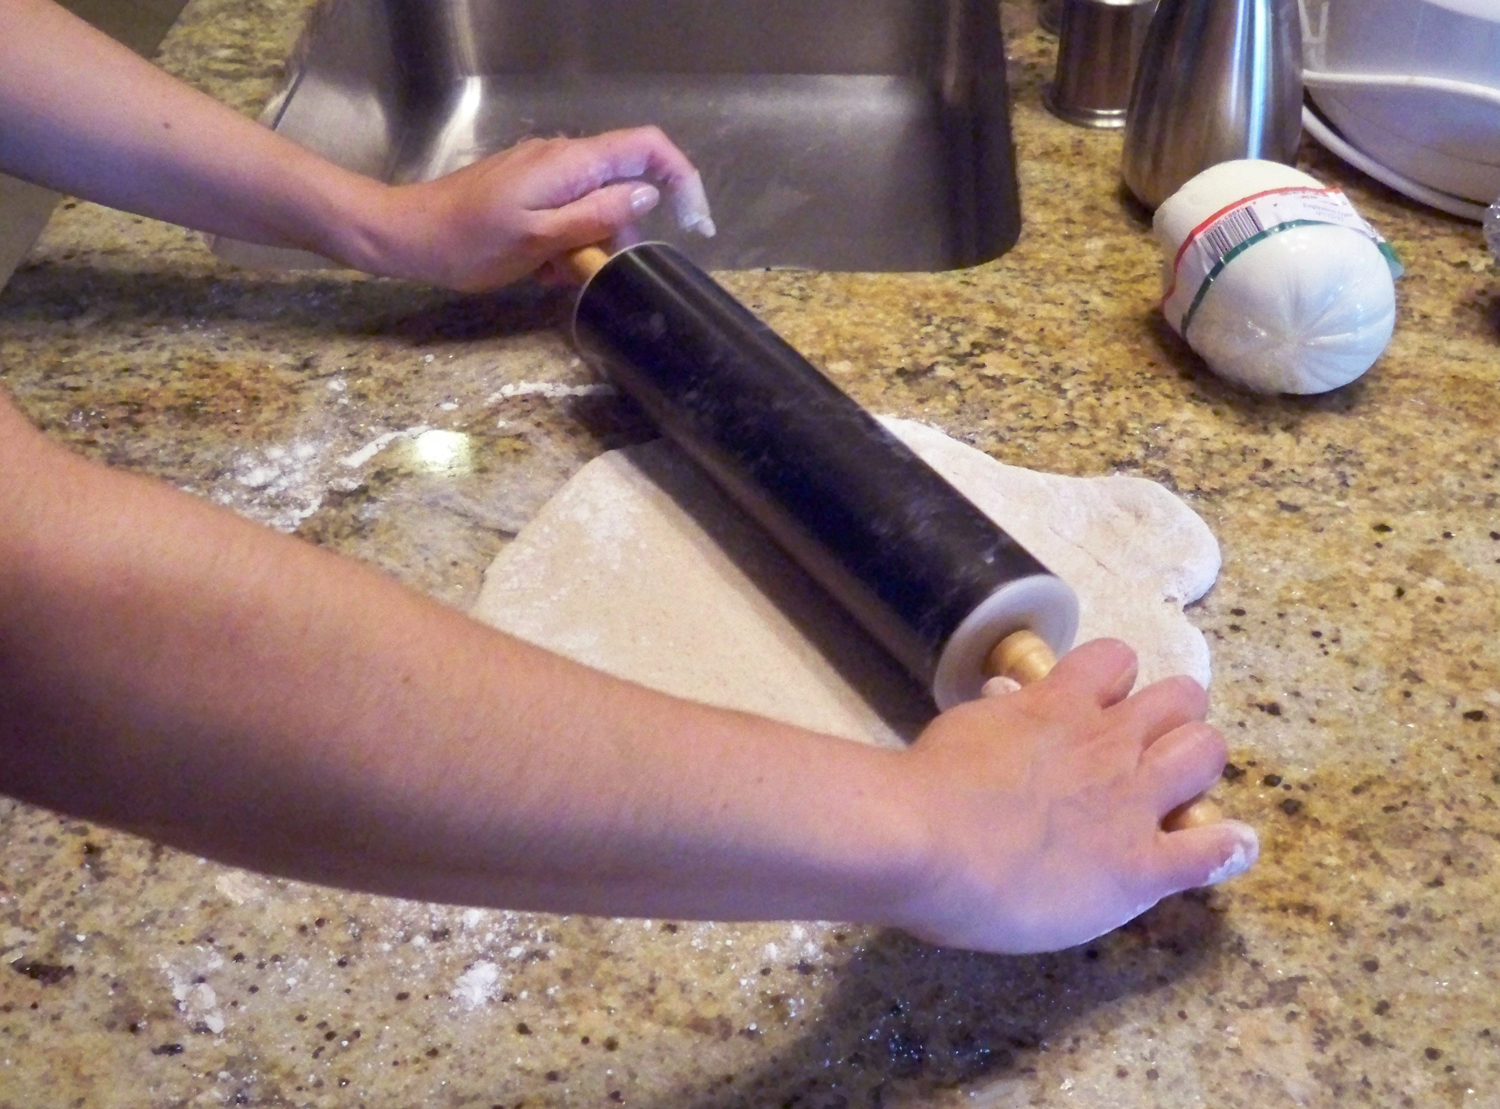
Roll out the dough use either your hand or rolling pin; don’t make the crust to thin. The dough is elastic feeling and you may need you to work with it a bit. If it’s keeps springing back into shape allow it to rest for 15 minutes and try again.
-
Have a cookie sheet or pizza peel nearby to place the dough on when it’s ready. Before you transfer the pizza sprinkle the cookie sheet and the top of the dough liberally with cornmeal. Be sure to flip the rolled out dough over when you place it on the cookie sheet so the corn meal is now on the bottom of the pizza. This will add a nice crunch to the dough and make it so you can slide the pizza off the cookie sheet and on to your heated pizza stone in the grill. I have recently seen someone use a pastry cloth on the top of the pizza peel to keep the dough from sticking and I think I am going to buy a cloth and give this method a try. By sliding the pizza at the same time as you gently pull on the cloth the pizza just slides right off the peel, kind of like the end of a conveyer belt. When I get the cloth and try this system I will post pictures.
Building the Pies
-
BBQ pizza first. Coat the crust lightly with olive oil, salt and pepper. Then layer on the mozzarella and BBQ sauce followed by the meat and veggies. Next I put the cheddar and blue cheese, last I doted the top of the pie with the garlic. Done!
-
Salami pizza next. I start with the olive oil, salt pepper and Italian spices, next the mozzarella and then sliced tomatoes. Next the rest of the veggies go on, be sure to drain the artichoke hearts well, you don’t want to much wet stuff on your pizza. Then the melting cheese, Parmesan cheese and last the garlic. Done!

-
I normally advocate this crazy three part baking system for pizza done in the oven. But on my Traeger this silliness is a thing of the past, it’s that hot inside this baby. I just load up the pie and slap it on the grill! If you are using an oven the three part process is explained on the page here with the dough recipe. I let the pizzas bake for about 8-10 minutes before checking them, don’t forget to look under the edge and be sure that you are not burning the crust.
-
Before I serve the pizzas I let them rest for about five minutes so that when I cut into them the cheese will not slide off. On the BBQ pizza I sprinkled a little crushed red pepper and on the salami pie I sprinkled on more Parmesan cheese and fresh basil. Enjoy!


Trackbacks/Pingbacks